Lets figure out the GraphQL for Conway - Part One
It would be advisable to grab an adult beverage before you start reading as this is a longer than usual post.
Ready? Then lets begin.
In his blog post Christoffer Bergman describes implementing Conways Game of Life in Cypher. I’m going to base my attempt at Conway Game Of Life on his work but using GraphQL instead of Cypher. To do that I’m going to need a GraphQL schema and a GraphQL service. Then I can experiment with GraphQL Queries / Mutations to figure out what is needed to implement the game.
For the GraphQL service I will be using the GraphQL for Aura Beta which will need a schema, also known as Type Definitions and that’s the goal of this post.
You may guess from those words that this will be a fairly long entry.
I’d go get another adult beverage from the fridge.
Eyes open
Christoffer used a Neo4j schema with a Cell node that uses a boolean property, alive, to represent the cells state ( true = alive and false = dead ). A Spatial coordinate is used to represent a Cells position in the grid with Cells being connected to each other using a NEIGHBOUR_OF relationship.
I will represent this in GraphQL ‘as is’ apart from an adjustment for a Cells position to use x and y properties as it makes GraphQL operations somewhat easier. I’ll also add in an ID for good measure. My GraphQL schema looks like this
type Cell @node {
 cellsConnected: [Cell!]! @relationship(type: "NEIGHBOUR_OF", direction: IN)
 connectedCells: [Cell!]! @relationship(type: "NEIGHBOUR_OF", direction: OUT)
 alive: Boolean!
 id: String!
 x: BigInt!
 y: BigInt!
}
I would like to say I wrote this but I didn’t. Instead I ran Cypher against an Aura instance to create Cells and then place them into a grid using the NEIGHBOUR_OF relationship. THis allowsed to me to use a modified version of the GraphQL Introspector to generate the GraphQL schema. I will also be using the same Aura DB with GraphQL for Aura which means I have some data already present to try out. Win win really.
Look what you made me do
As I’m using Aura I will need an edition that allows for GraphQL. If you’re already using Aura Professional, Business Critical or Virtual Dedicated Cloud account, then you are good to go. If you don’t have one of these, then sign up for an Aura Profressional Trial account as the GraphQL for Neo4j AuraDB Beta is not avaiable on Aura Free.
Signing up for an Aura Pro Trial
- Head over to Signing up for AuraDB and complete that process.
- Create an instance but choose Aura Professional ‘Try For Free’
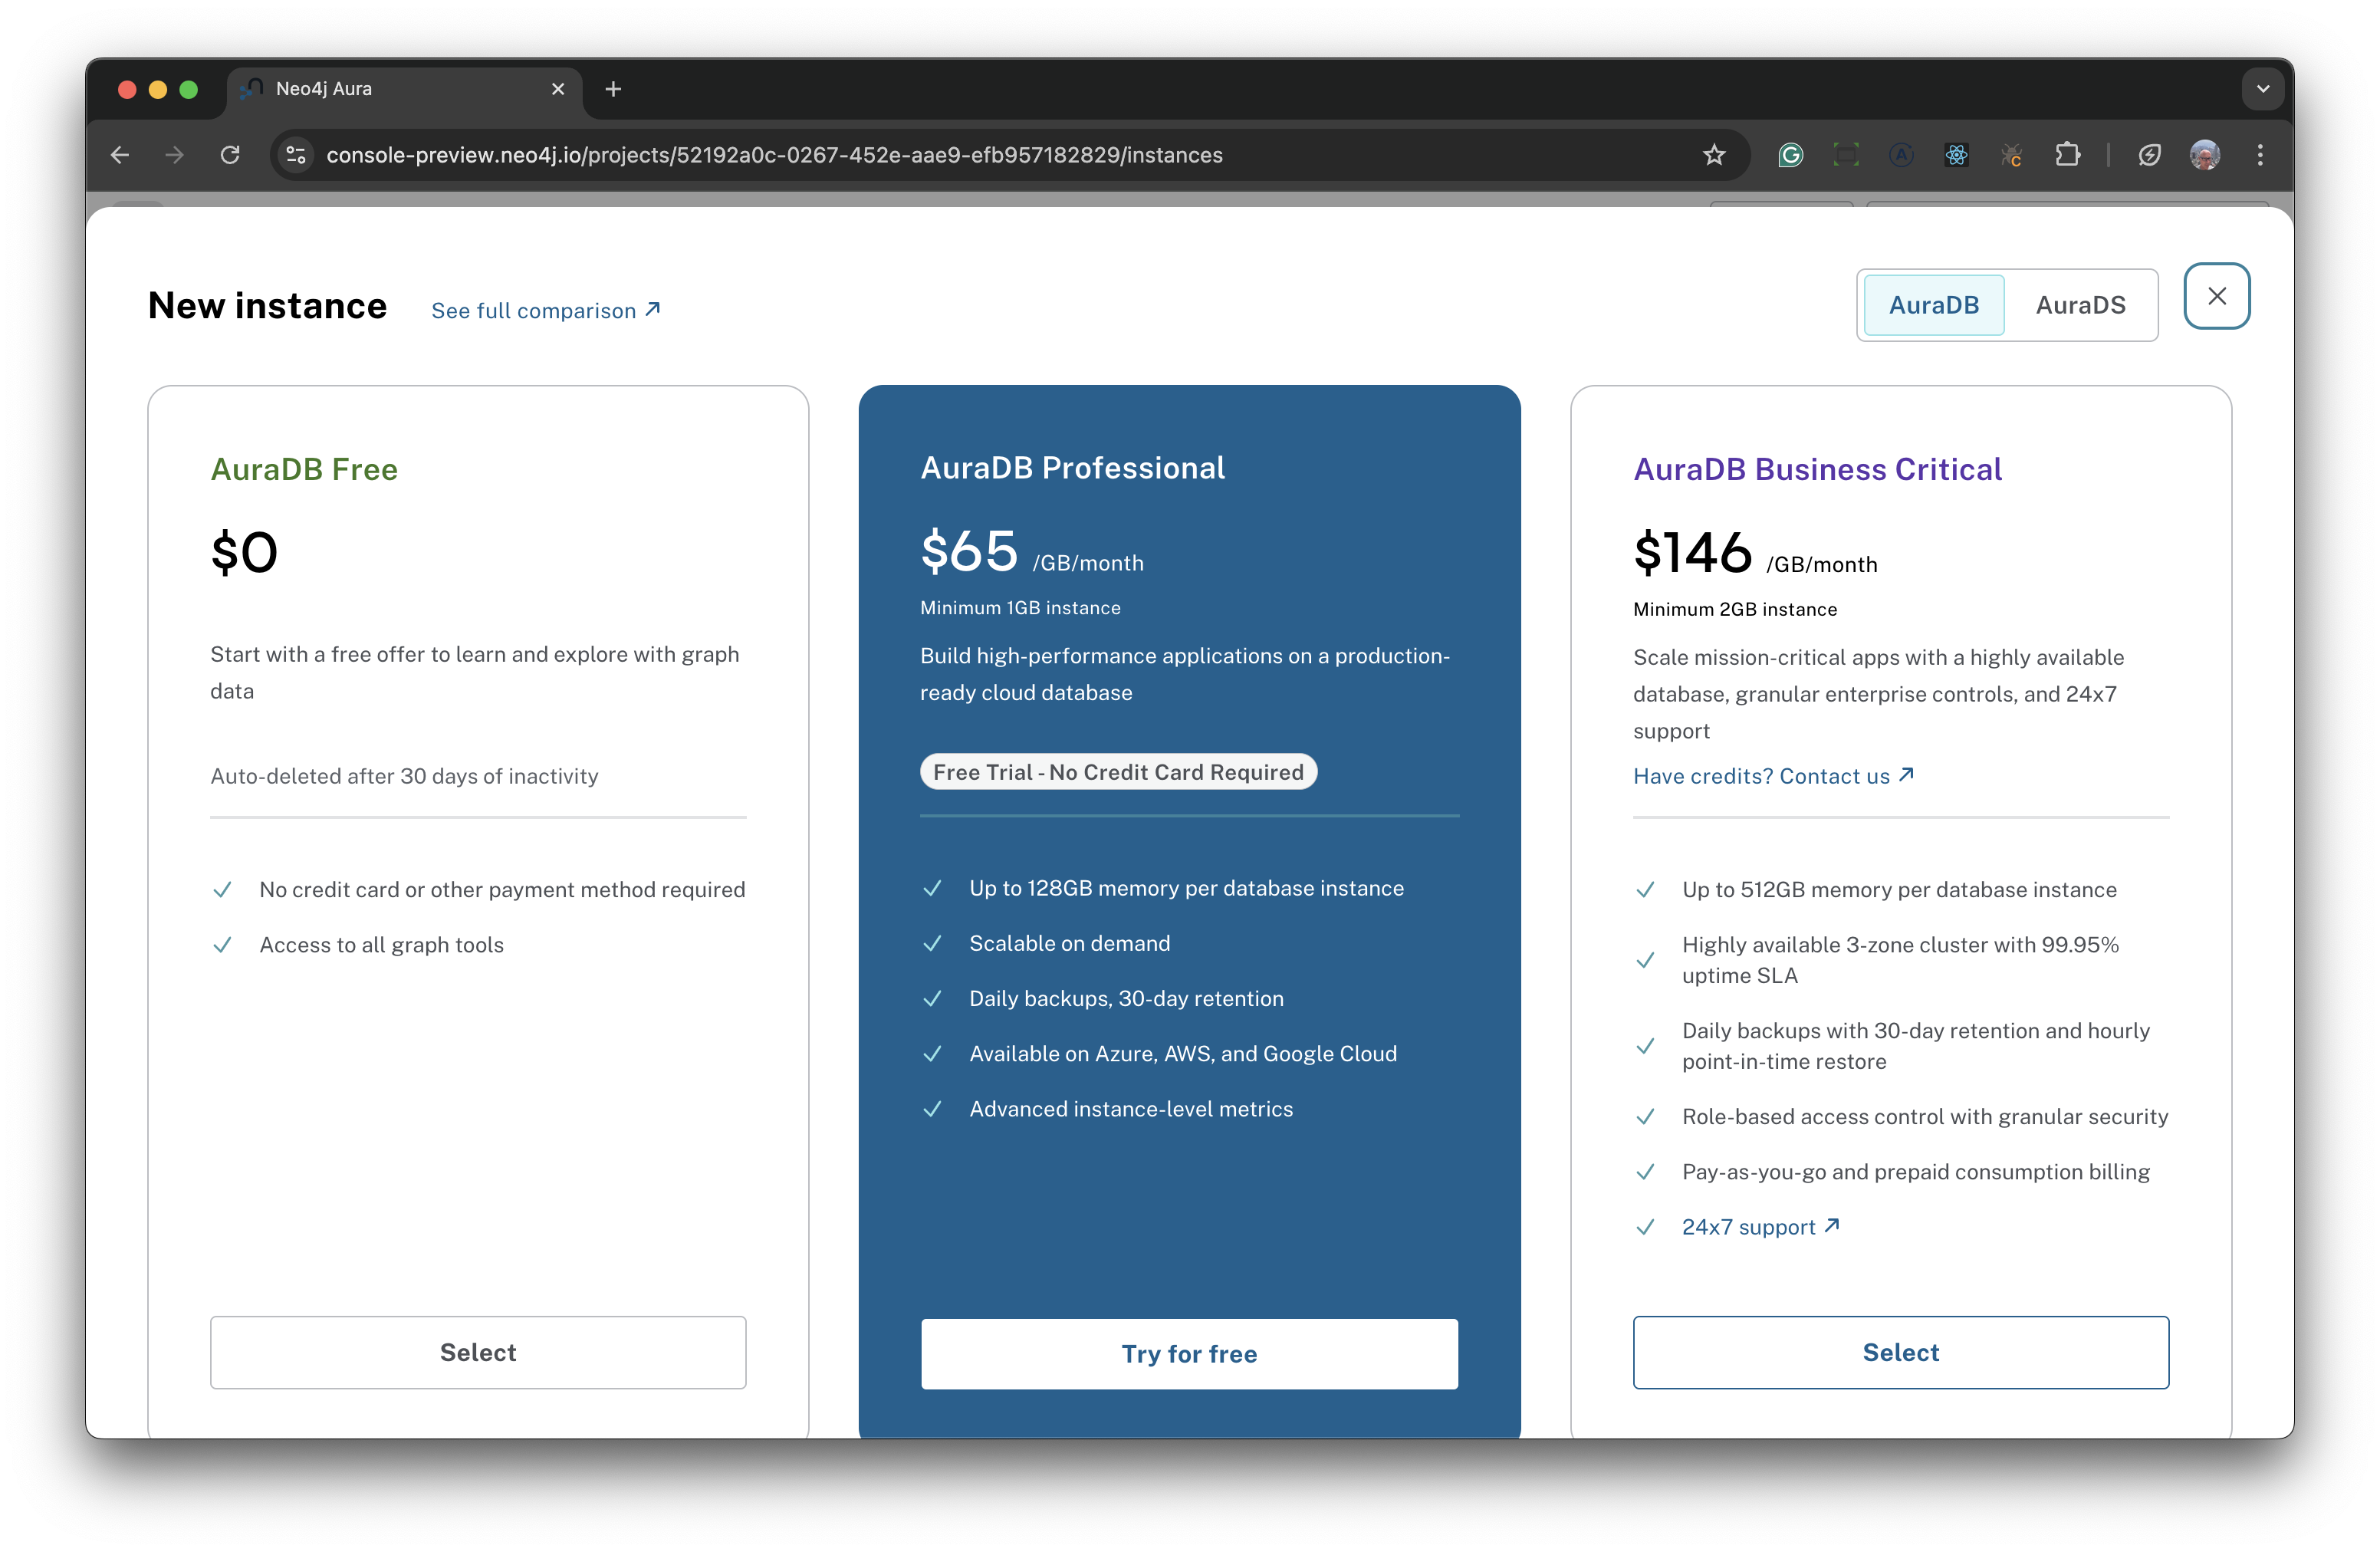
- Select your cloud provider , the 4Gb instance, suggested name and accept the terms
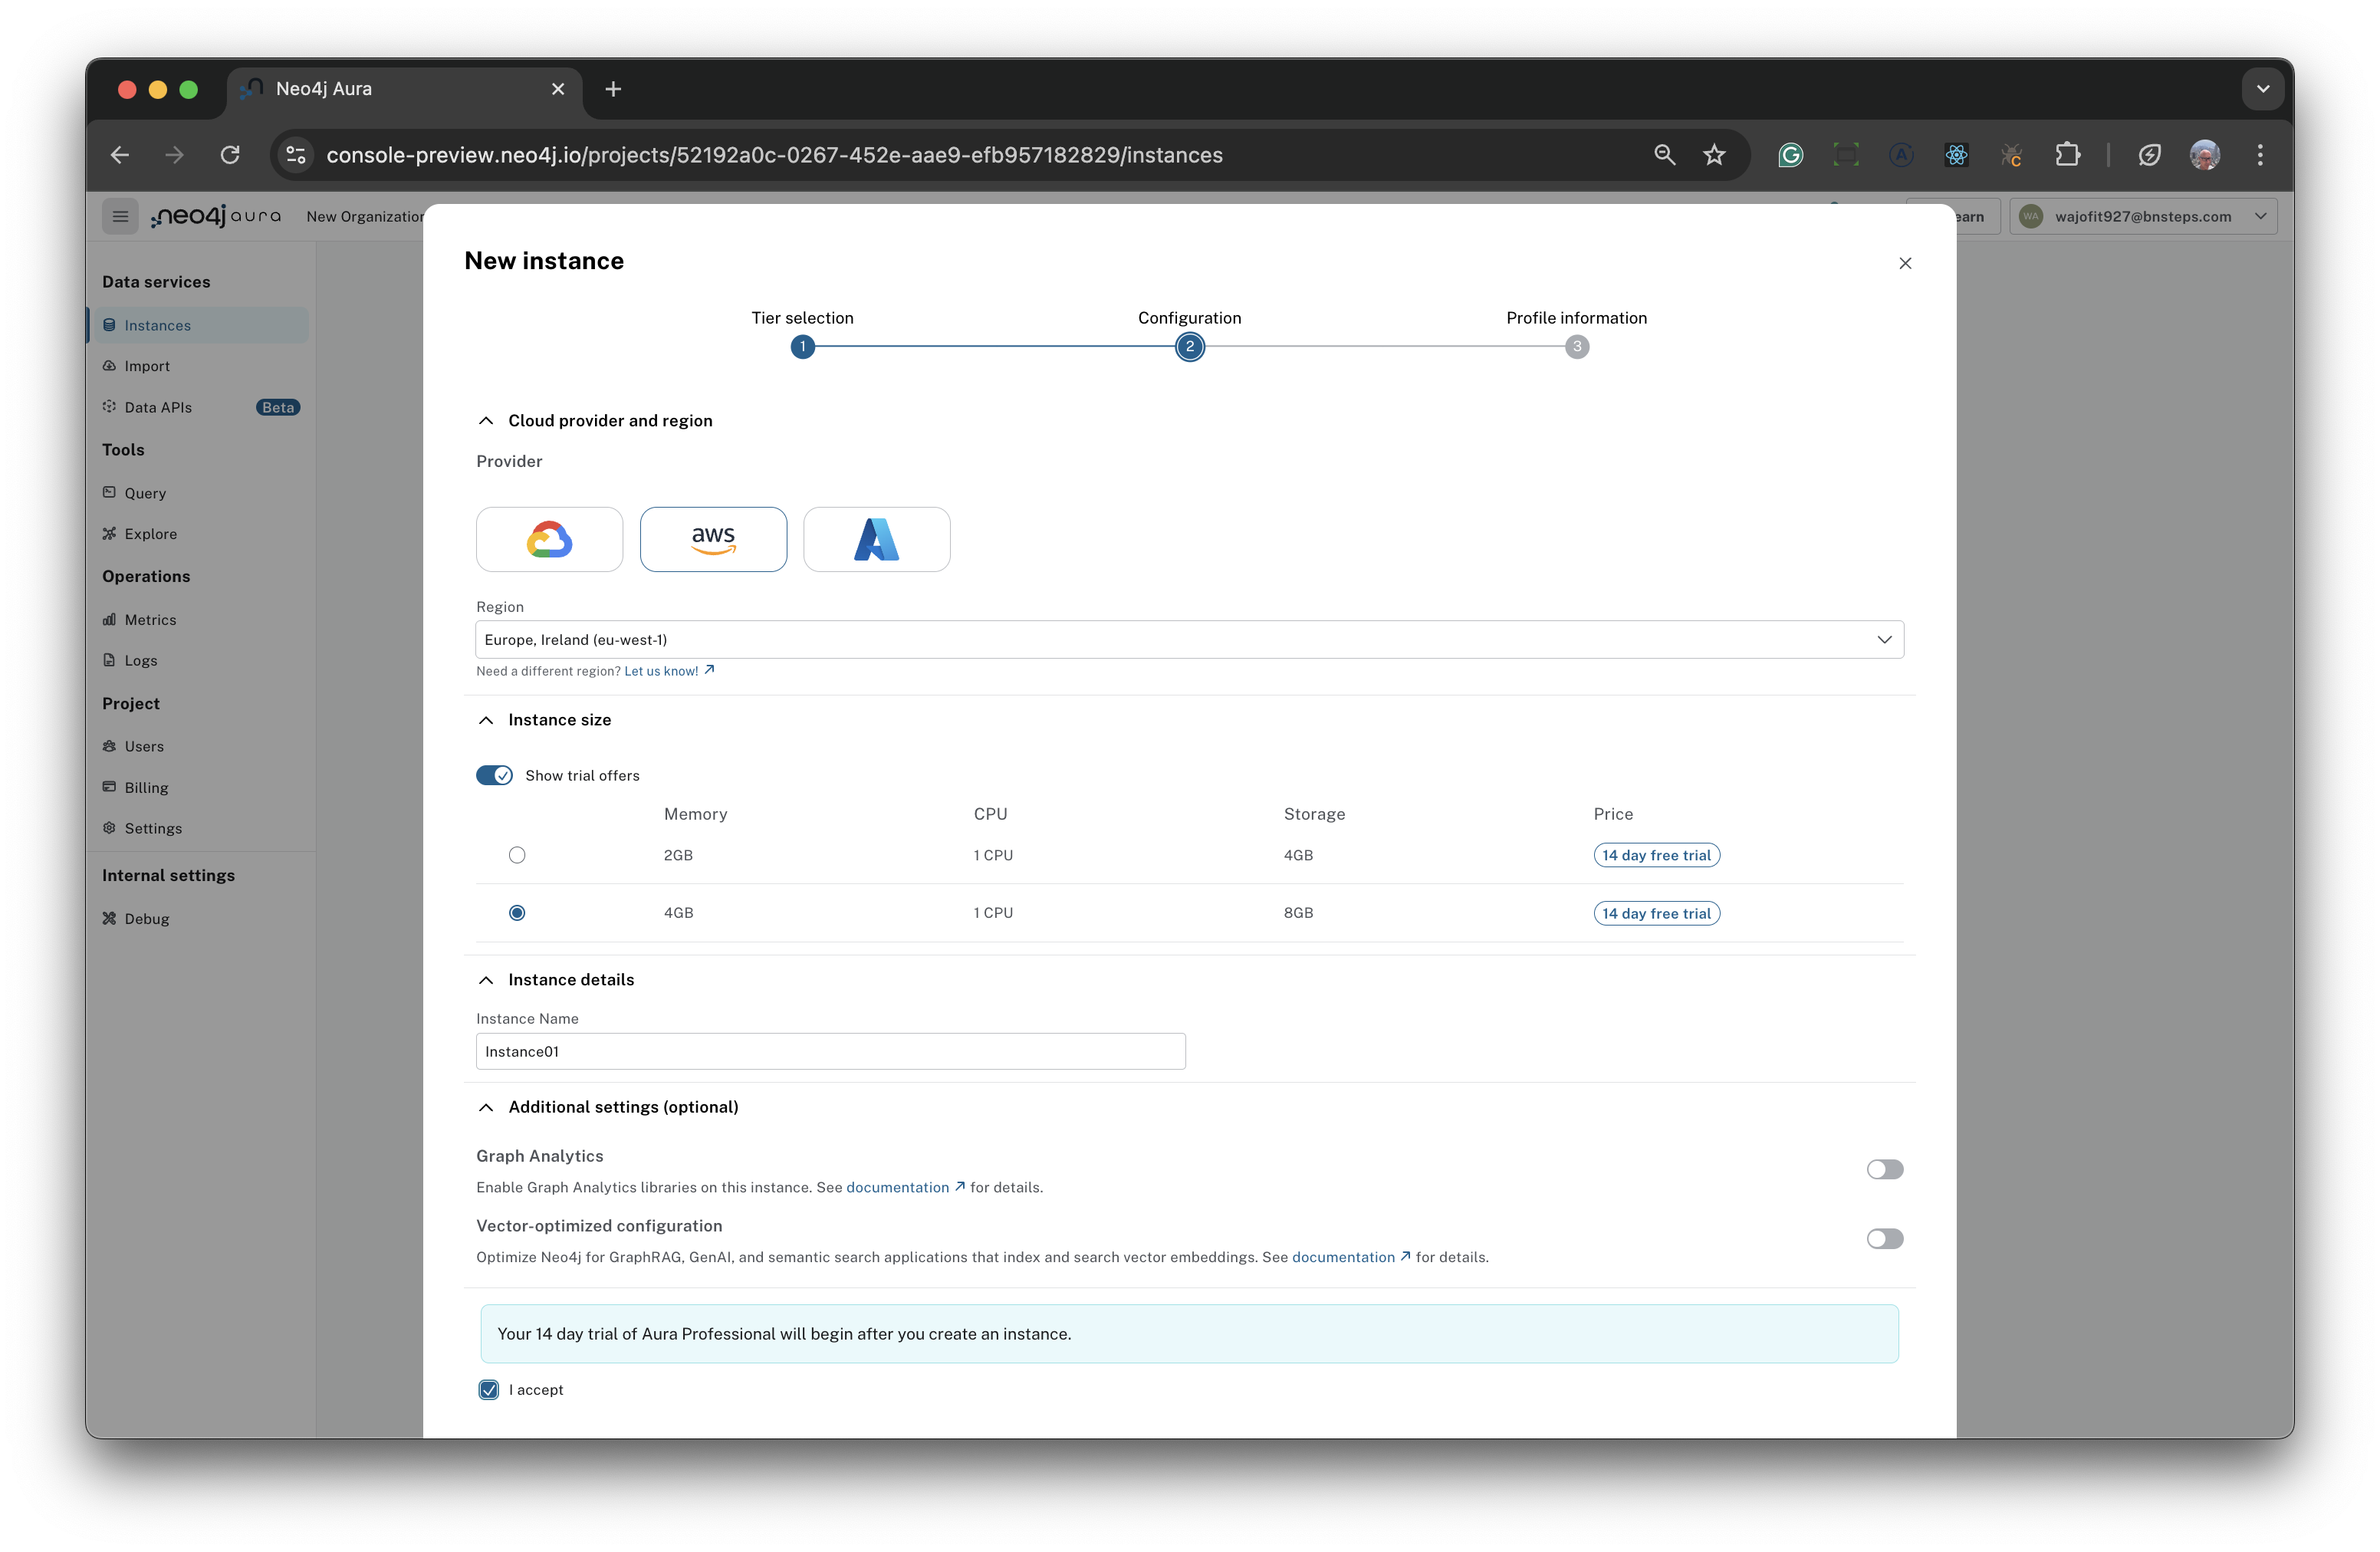
- Wait for the instance to be deployed and , IMPORTANT BIT, make sure you save the connection information.
I knew you were trouble
Now that we have a deployed Aura DB, let run some Cypher against it to create Cells and link them together. This will enable the GraphQL Introspector to infer a GraphQL Schema.
First create a few cells with the properties we want to give us a 10x10 grid.
UNWIND range(1,10) as x
    UNWIND range (1,10) as y
    CREATE (c:Cell {id:x + '_' + y, x: x, y: y, alive: False})
RETURN COUNT(c)
Then join a cells together with it’s immediate neighbours using the NEIGHBOUR_OF relationship whilst avoiding joining a cell to itself.
MATCH(ac:Cell)
UNWIND ac AS c
CALL (c) {
    MATCH (c2:Cell)
    WHERE c2.x-1<=c.x<=c2.x+1
    AND c2.y-1<=c.y<=c2.y+1
    AND c.id <> c2.id
    MERGE (c)-[:NEIGHBOUR_OF]->(c2)
}
Shake it off
The GraphQL schema was generated using the Introspect tool which I had adapted to use the GraphQL v7 library used by the GraphQL for Neo4j AuraDB. If you want to see how to modify the Introspector and build your own, see this blog post.
I have createad a GitHUb repo with everything already done. To use this , do the following
- Clone the repo
git clone https://github.com/LackOfMorals/my-graphql-introspector.git
- Install dependencies
cd my-graphql-introspector
npm install
- Set connection to your AuraDB by creating a .env file at the root of the installation folder my-graphql-introspector. Replace values for NEO4J_URI, NEO4J_USR and NEO4J_PWD with those values that match your configuraiton.
NEO4J_URI=neo4j://localhost:7687
NEO4J_USR=neo4j
NEO4J_PWD=password
- Run the Introspector
node ./src/intro.csj
If everything has been configured correctly you will see the GraphQL schema which means we’re now ready to deploy GraphQL for AuraDB Beta.
Blank space
Jump back into the Aura Console.
Note: You will need the username and password for your Aura DB instance that we just used in the previous step with the GraphQL Instrospector.
-
From the left hand side of the Aura Console, select Data APIs Beta and then Create API
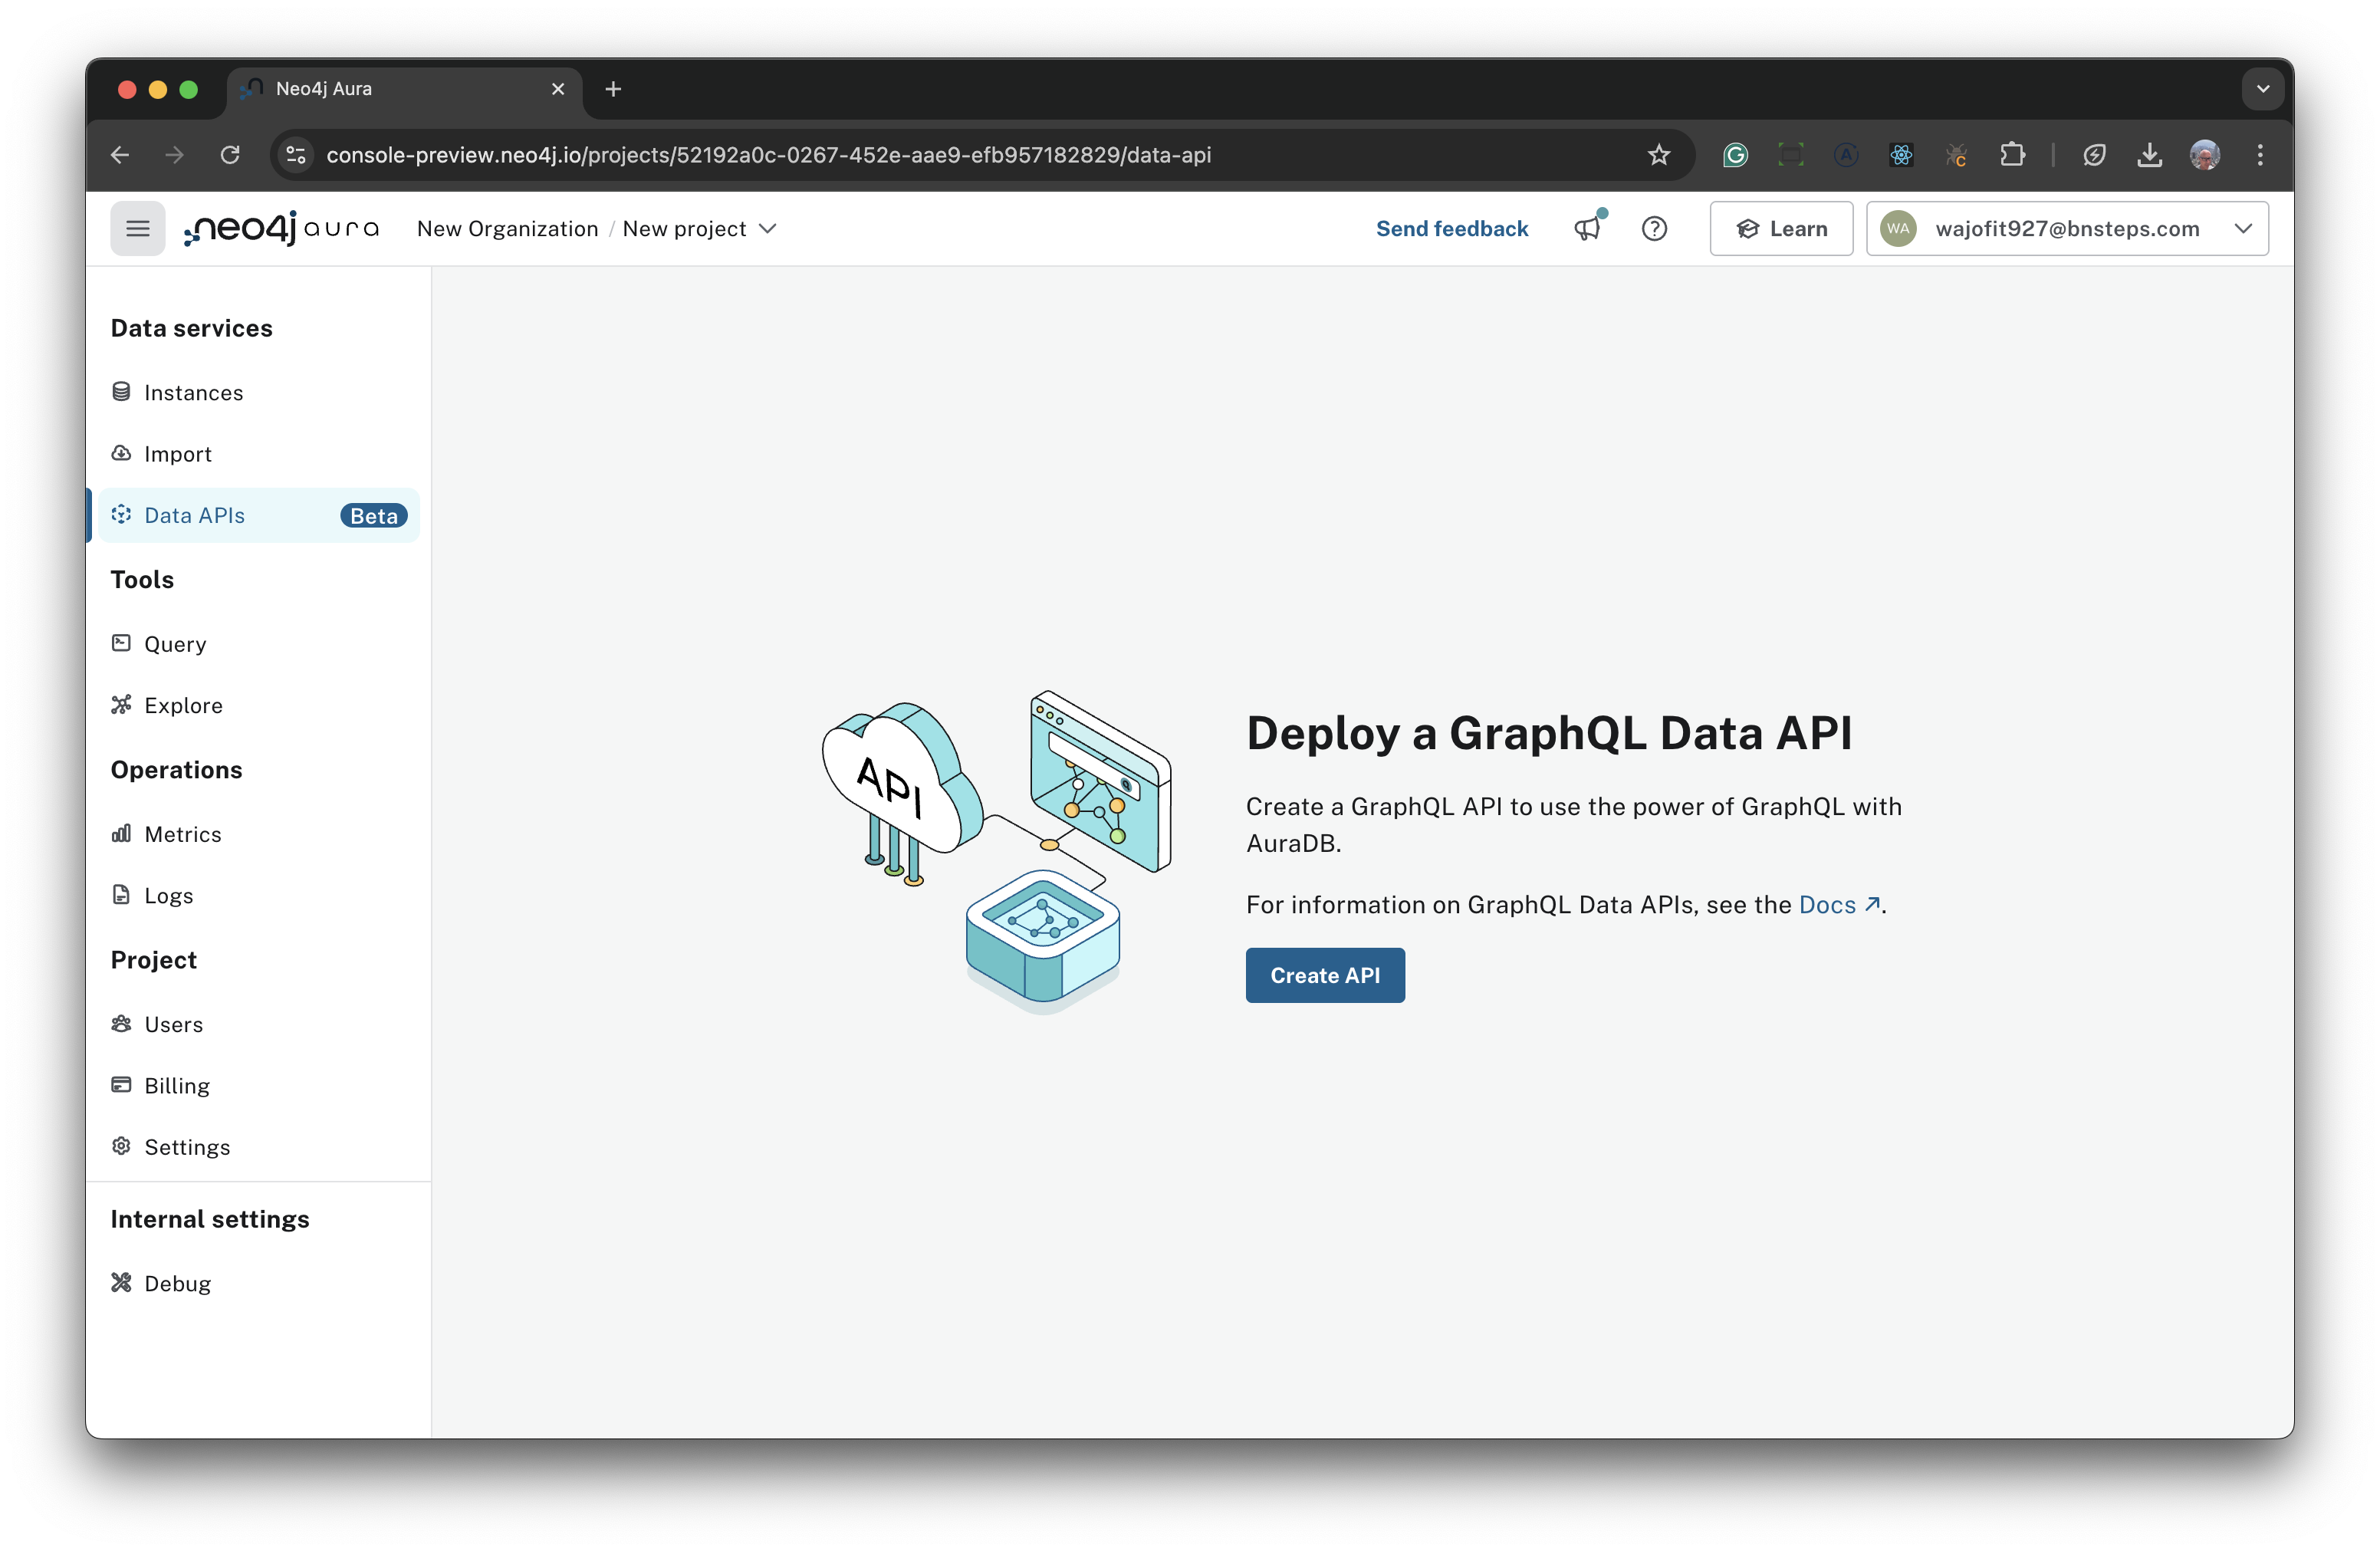
-
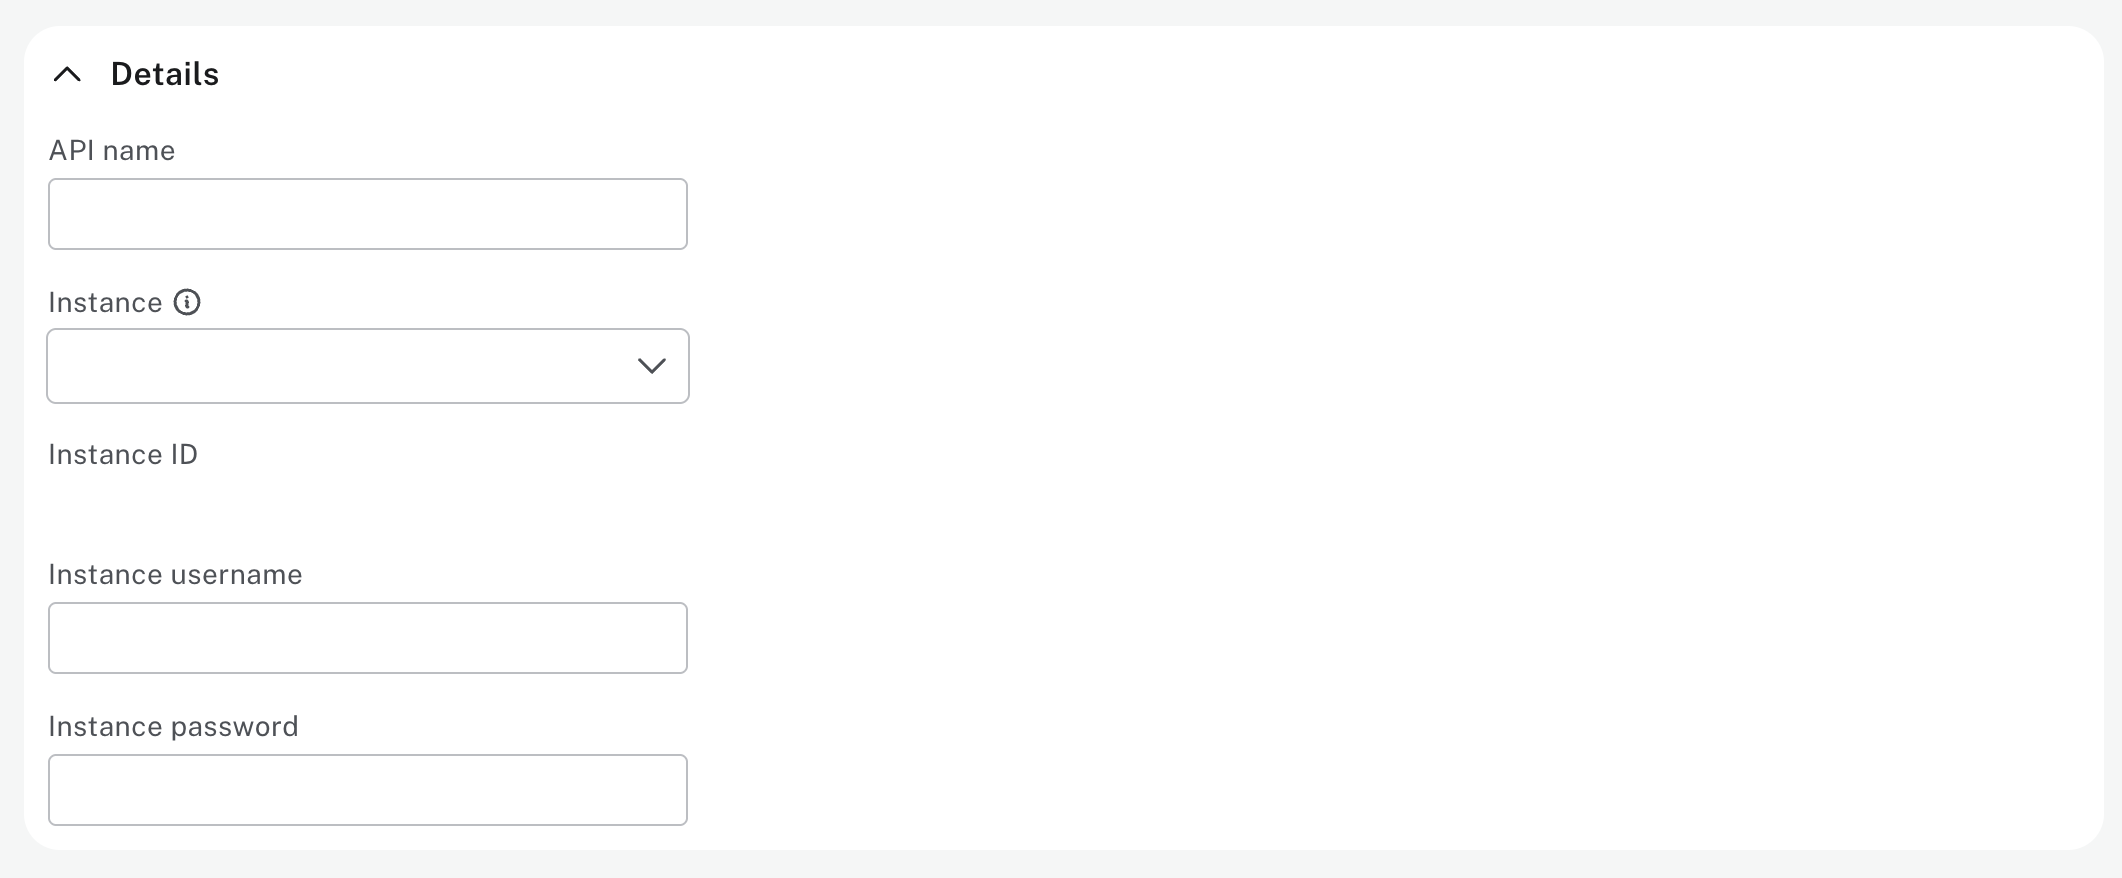
There’s a number of boxes to fill out and it doens’t fit nicely into a single screenshot. I’ve broken these out into seperate steps.
-
Details
- API Name: a friendly name
- Instance: From the drop down, select the name of the Aura DB to use with GraphQL. Choose the one that was used with Cypher / Introspector
- Instance username: The username for the Instance you selected
- Instance password: The password for the Instance you selected
-
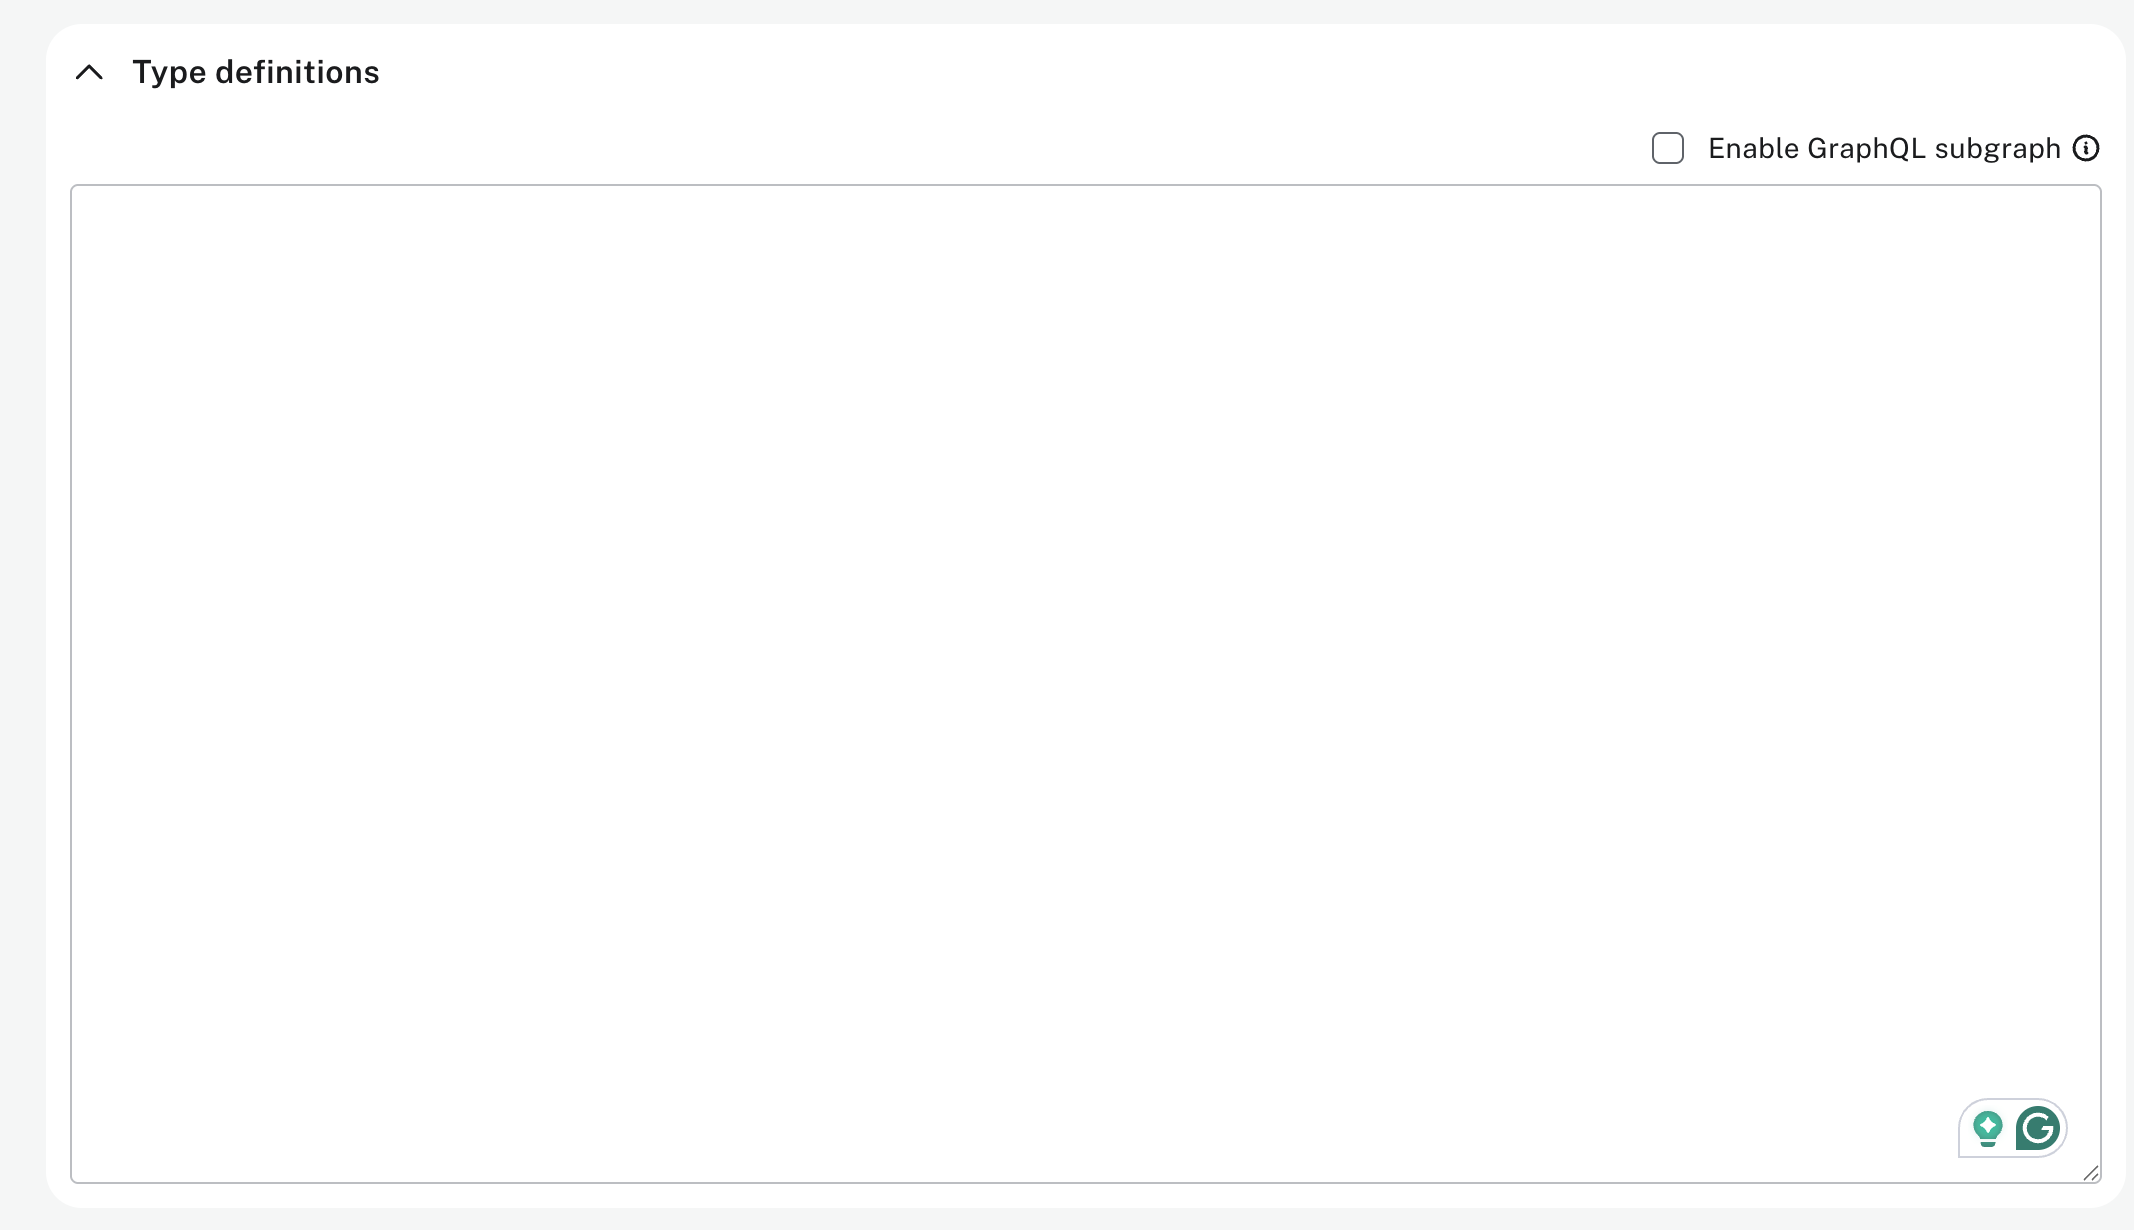
Type Definitions Copy and paste the GraphQL schema that came from the Introspection or just use the one at begining of this blog post. Do not select Enable GraphQL subgraph
-
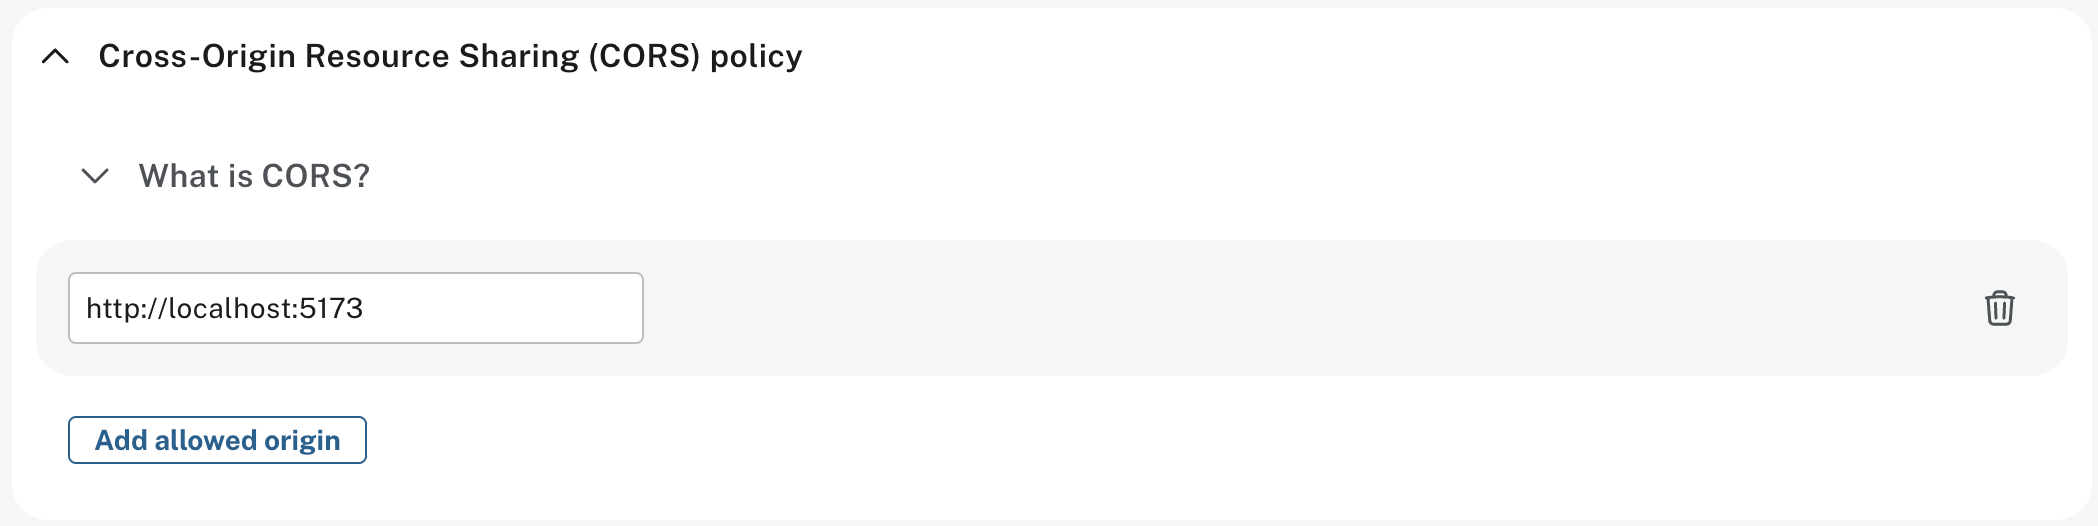
CORS policy

-
By default, as part of security layers around a GraphQL Data API, a very restrictive CORS policy excludes all communications coming from a browser. This will be problematic for any browser based application. For more on CORs, AWS has a good write up here: - What is Cross-Origin Resource Sharing?. We will need to adjust the CORs policy.
-
As all of my development is using the vite framework on node.js, the browser will be using http://localhost:5173. This URL will need adding to the CORS policy. Do this by selecting Add allowed origin and entering the URL used by your browser.
-
Authentication providers

-
API key and secure JWT are supported for authentication to the GraphQL Data API. Authentication is always required. I’m going to use an API key.
- Select Add authenticaton provider
- Choose API key from the drop down
- Enter a friendly name for the API key. The key itself will automatically be generated when the GraphQL Data API itself is created at the end of this process.
-
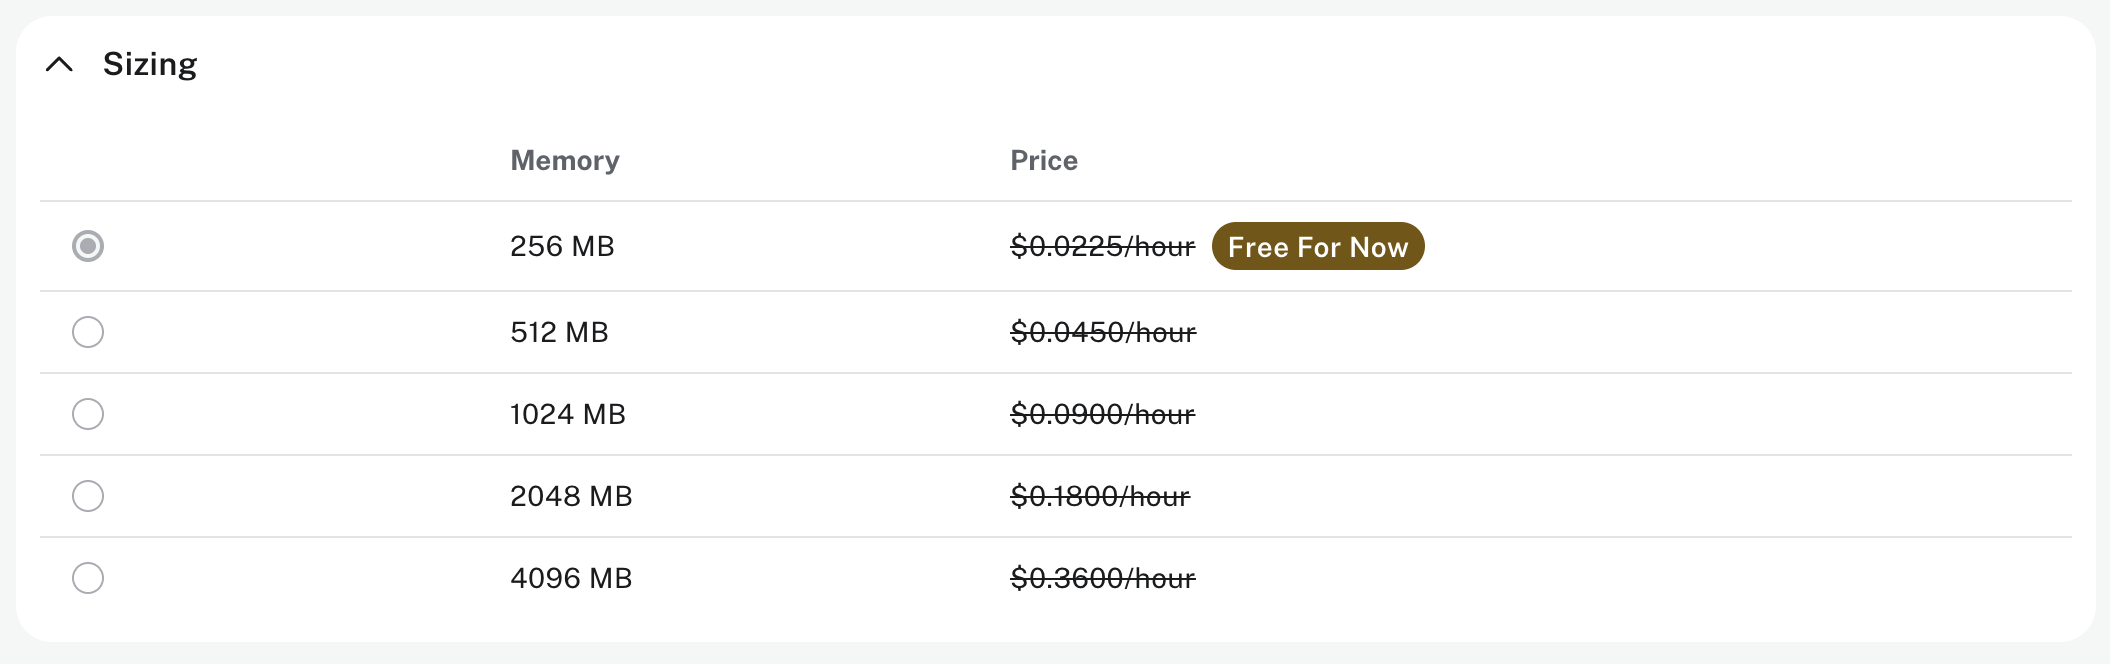
Sizing There will be a number of different sizes at different charging rates for GraphQL Data API when its fully released. The beta is free and uses a fixed size.
That’s everything. Select Create
Note: There’s a little defect that occasionally crops up that results in having to re-enter the Instance username and Instance password when there is no need to do so. This usally happens when something is not right at time of first creation or making an modification to an existing one. We’ll fix that before release. Hopefully. For now, just be aware of this undocumented feature that may not be supported in future versions.
If everything has been entered and validated you will see a window appear with the URL and API Key for the GraphQL Data API. Make sure you save this information in a safe place as there is no way to recover the API Key. If you do misplace the key, a new one will need to be furnished.
Deployment will take a few minutes. As this post is going on for way longer than I intended, now is would be a good time for a cup of tea. Or another adult beverage.
Cruel Summer
In the Aura console under Data APIs you should now see the GraphQL Data API with a status of Ready. We’ll now run a GraphQL Query, that returns the Cells we created earlier using Cypher, to test everything is working. curl will be used for this.
- Replace
- YOUR_GRAPHQL_DATA_API_URL with your URL for the GraphQL Data API
- YOUR_API_KEY with your API key
curl --location  'YOUR_GRAPHQL_DATA_API_URL' \
--header 'Content-Type: application/json' \
--header 'x-api-key: YOUR_API_KEY' \
--data '{"query":"query getAllCells {\n    cells {\n      alive\n      id\n      x\n      y\n    }\n  }","variables":{}}'
You should see a JSON response with the data.
Is it over now?
For now, yes, that’s it. We have a working GraphQL Data API which we can now use to figure out the various GraphQL Queries and Mutations to use with Conway Game Of Life.
Which we’ll do in the next blog .
Until then
Laters